
How I Transformed One Boring Side Table With Gold Flakes From The Dollar Store
The most expensively cheap makeover EVER.
|This post contains affiliate links, which means if you make a purchase through one of the links below, I may receive commission. Thank you for supporting the dollar store girl! |
Are you looking for a way to supplement your income with non-work related projects? Are you unemployed and need to generate some income? If that’s you then this post is for you! You can design this project for yourself to keep or make profit from it and eventually turn it into a business!
One of my hobbies is refurbishing old furniture into new, beautiful pieces. Sometimes I sell my pieces and sometimes I keep them for my self. Today's project was a creative idea that had come to mind when I was browsing through the craft aisle at dollarama.
This particular piece is the most beautiful piece that I have ever transformed and there are a couple reasons why I feel this way. Beginning with the fact that I used product from the dollar store that most people would not associate with furniture makeovers. Secondly, this makeover can help inspire others to make use of old pieces to keep for themselves or sell for profit to supplement income. And I love that.
Now I want to share that idea with you!

The idea
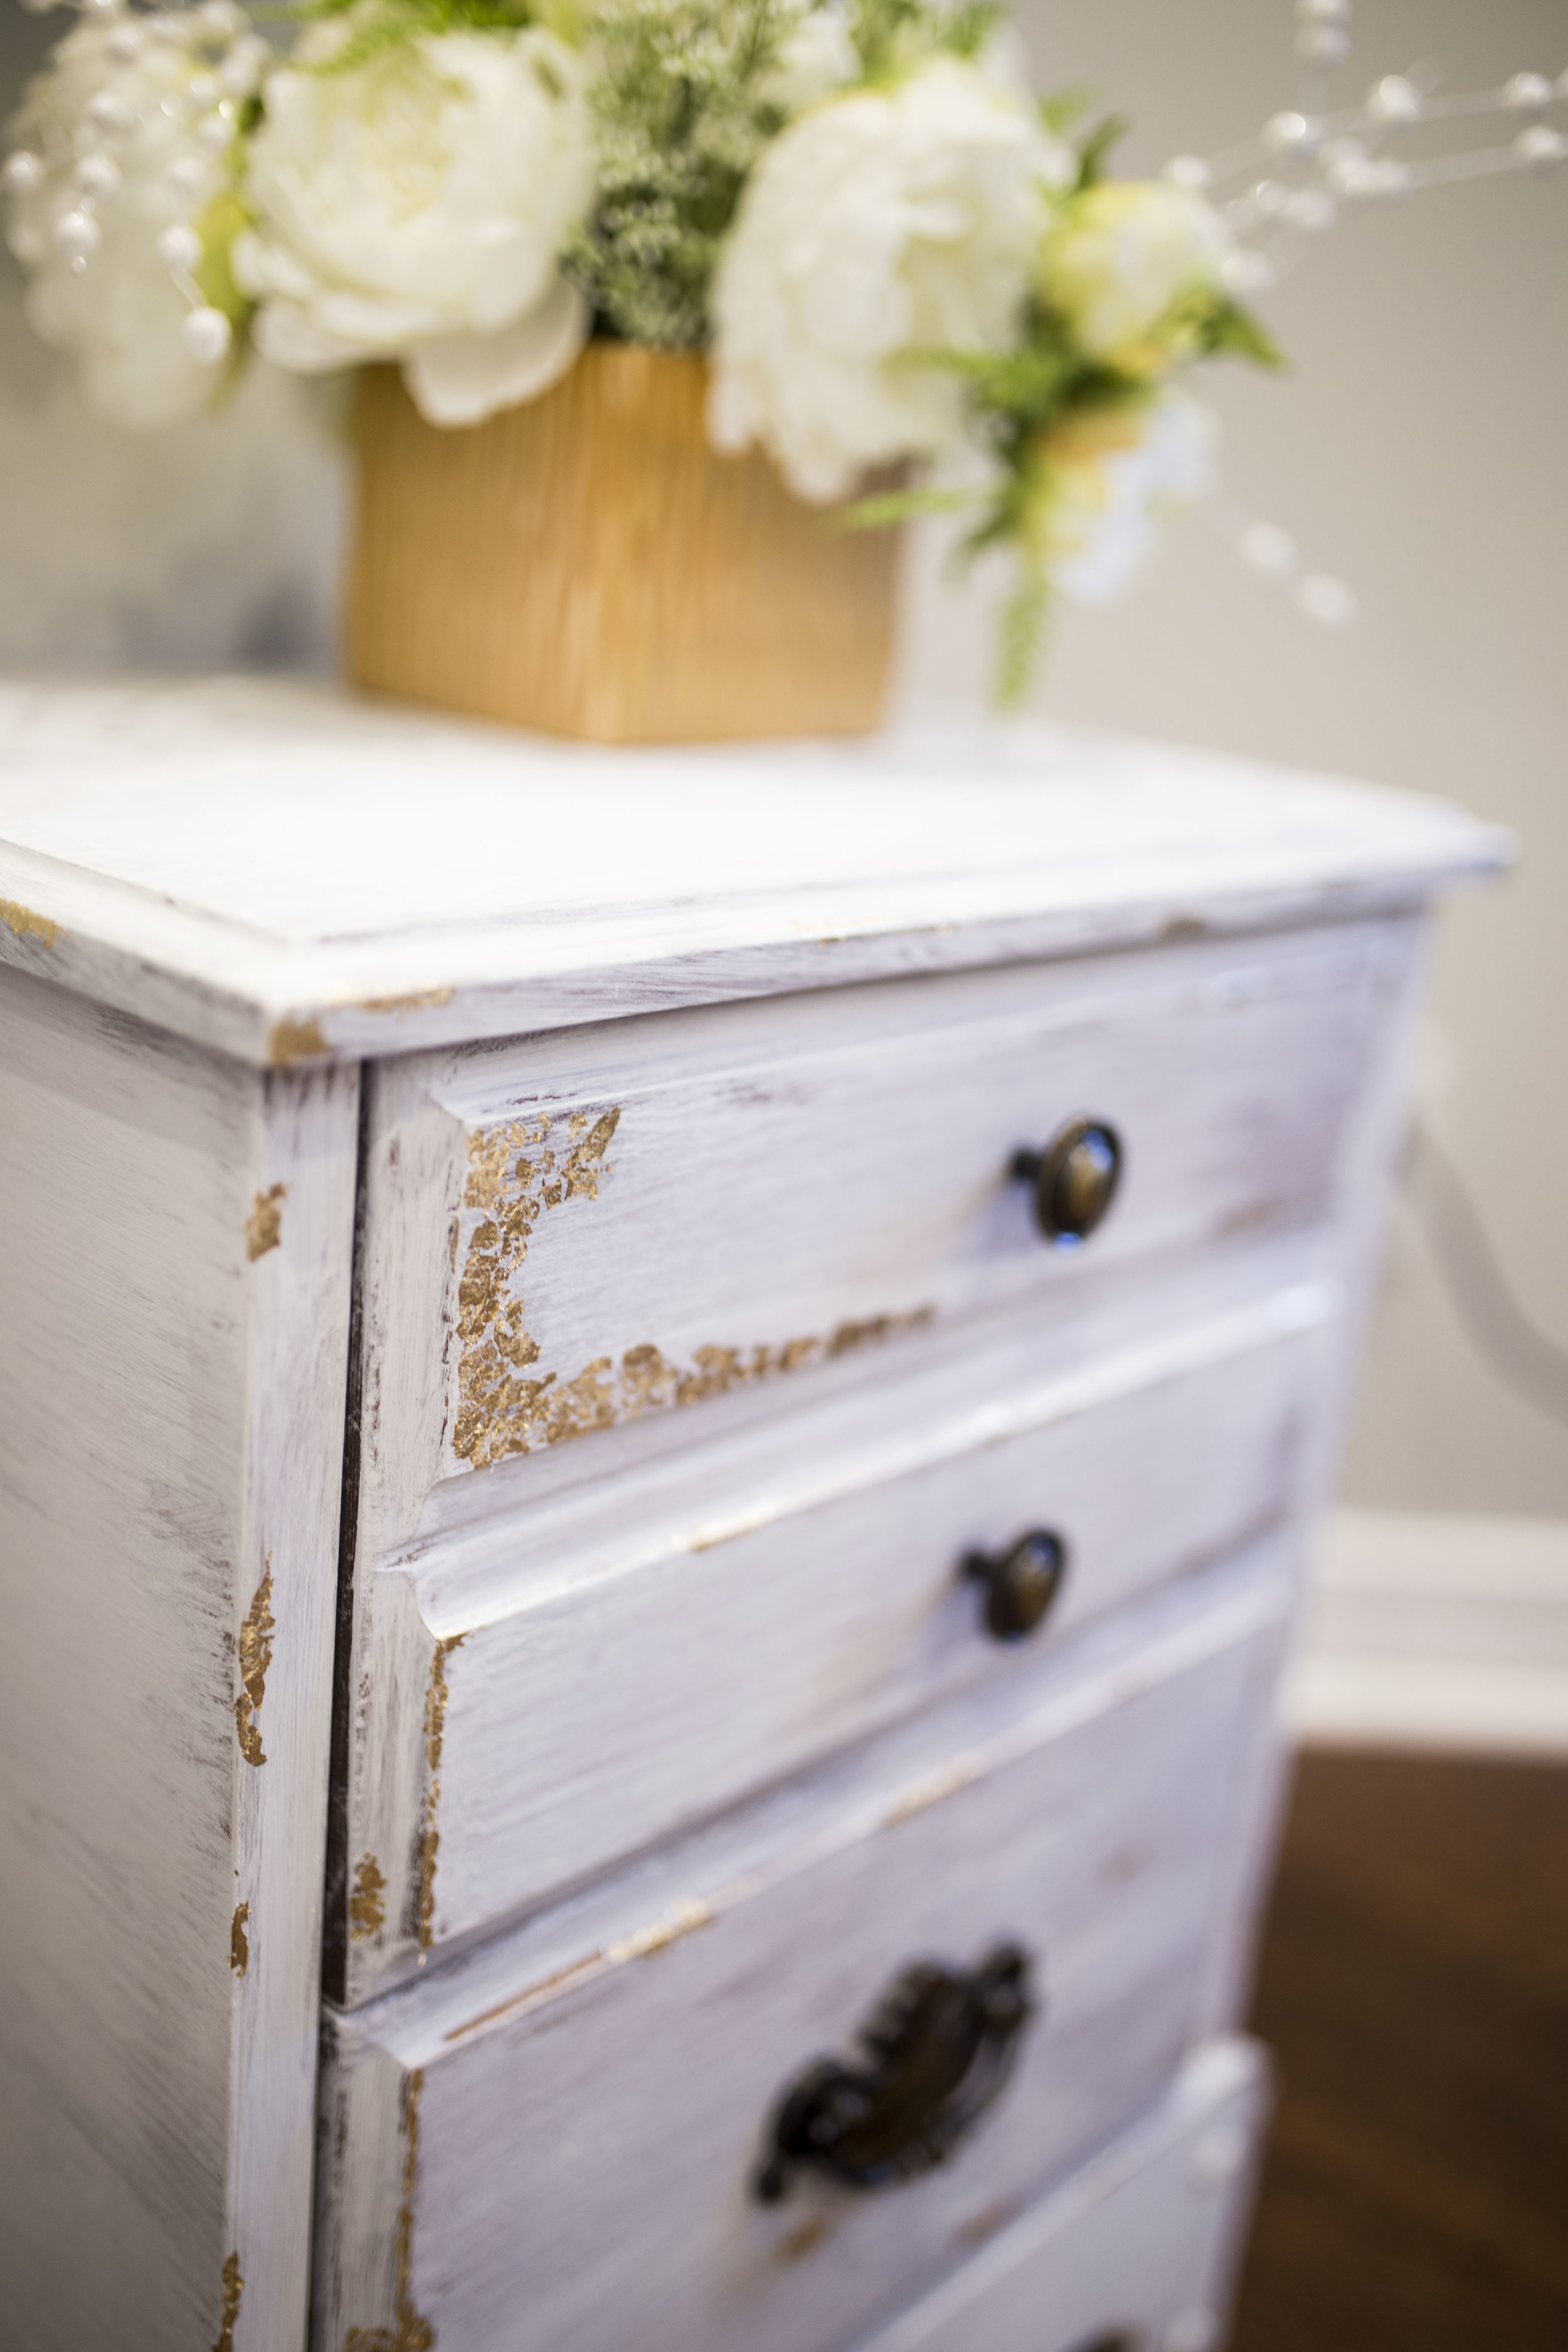
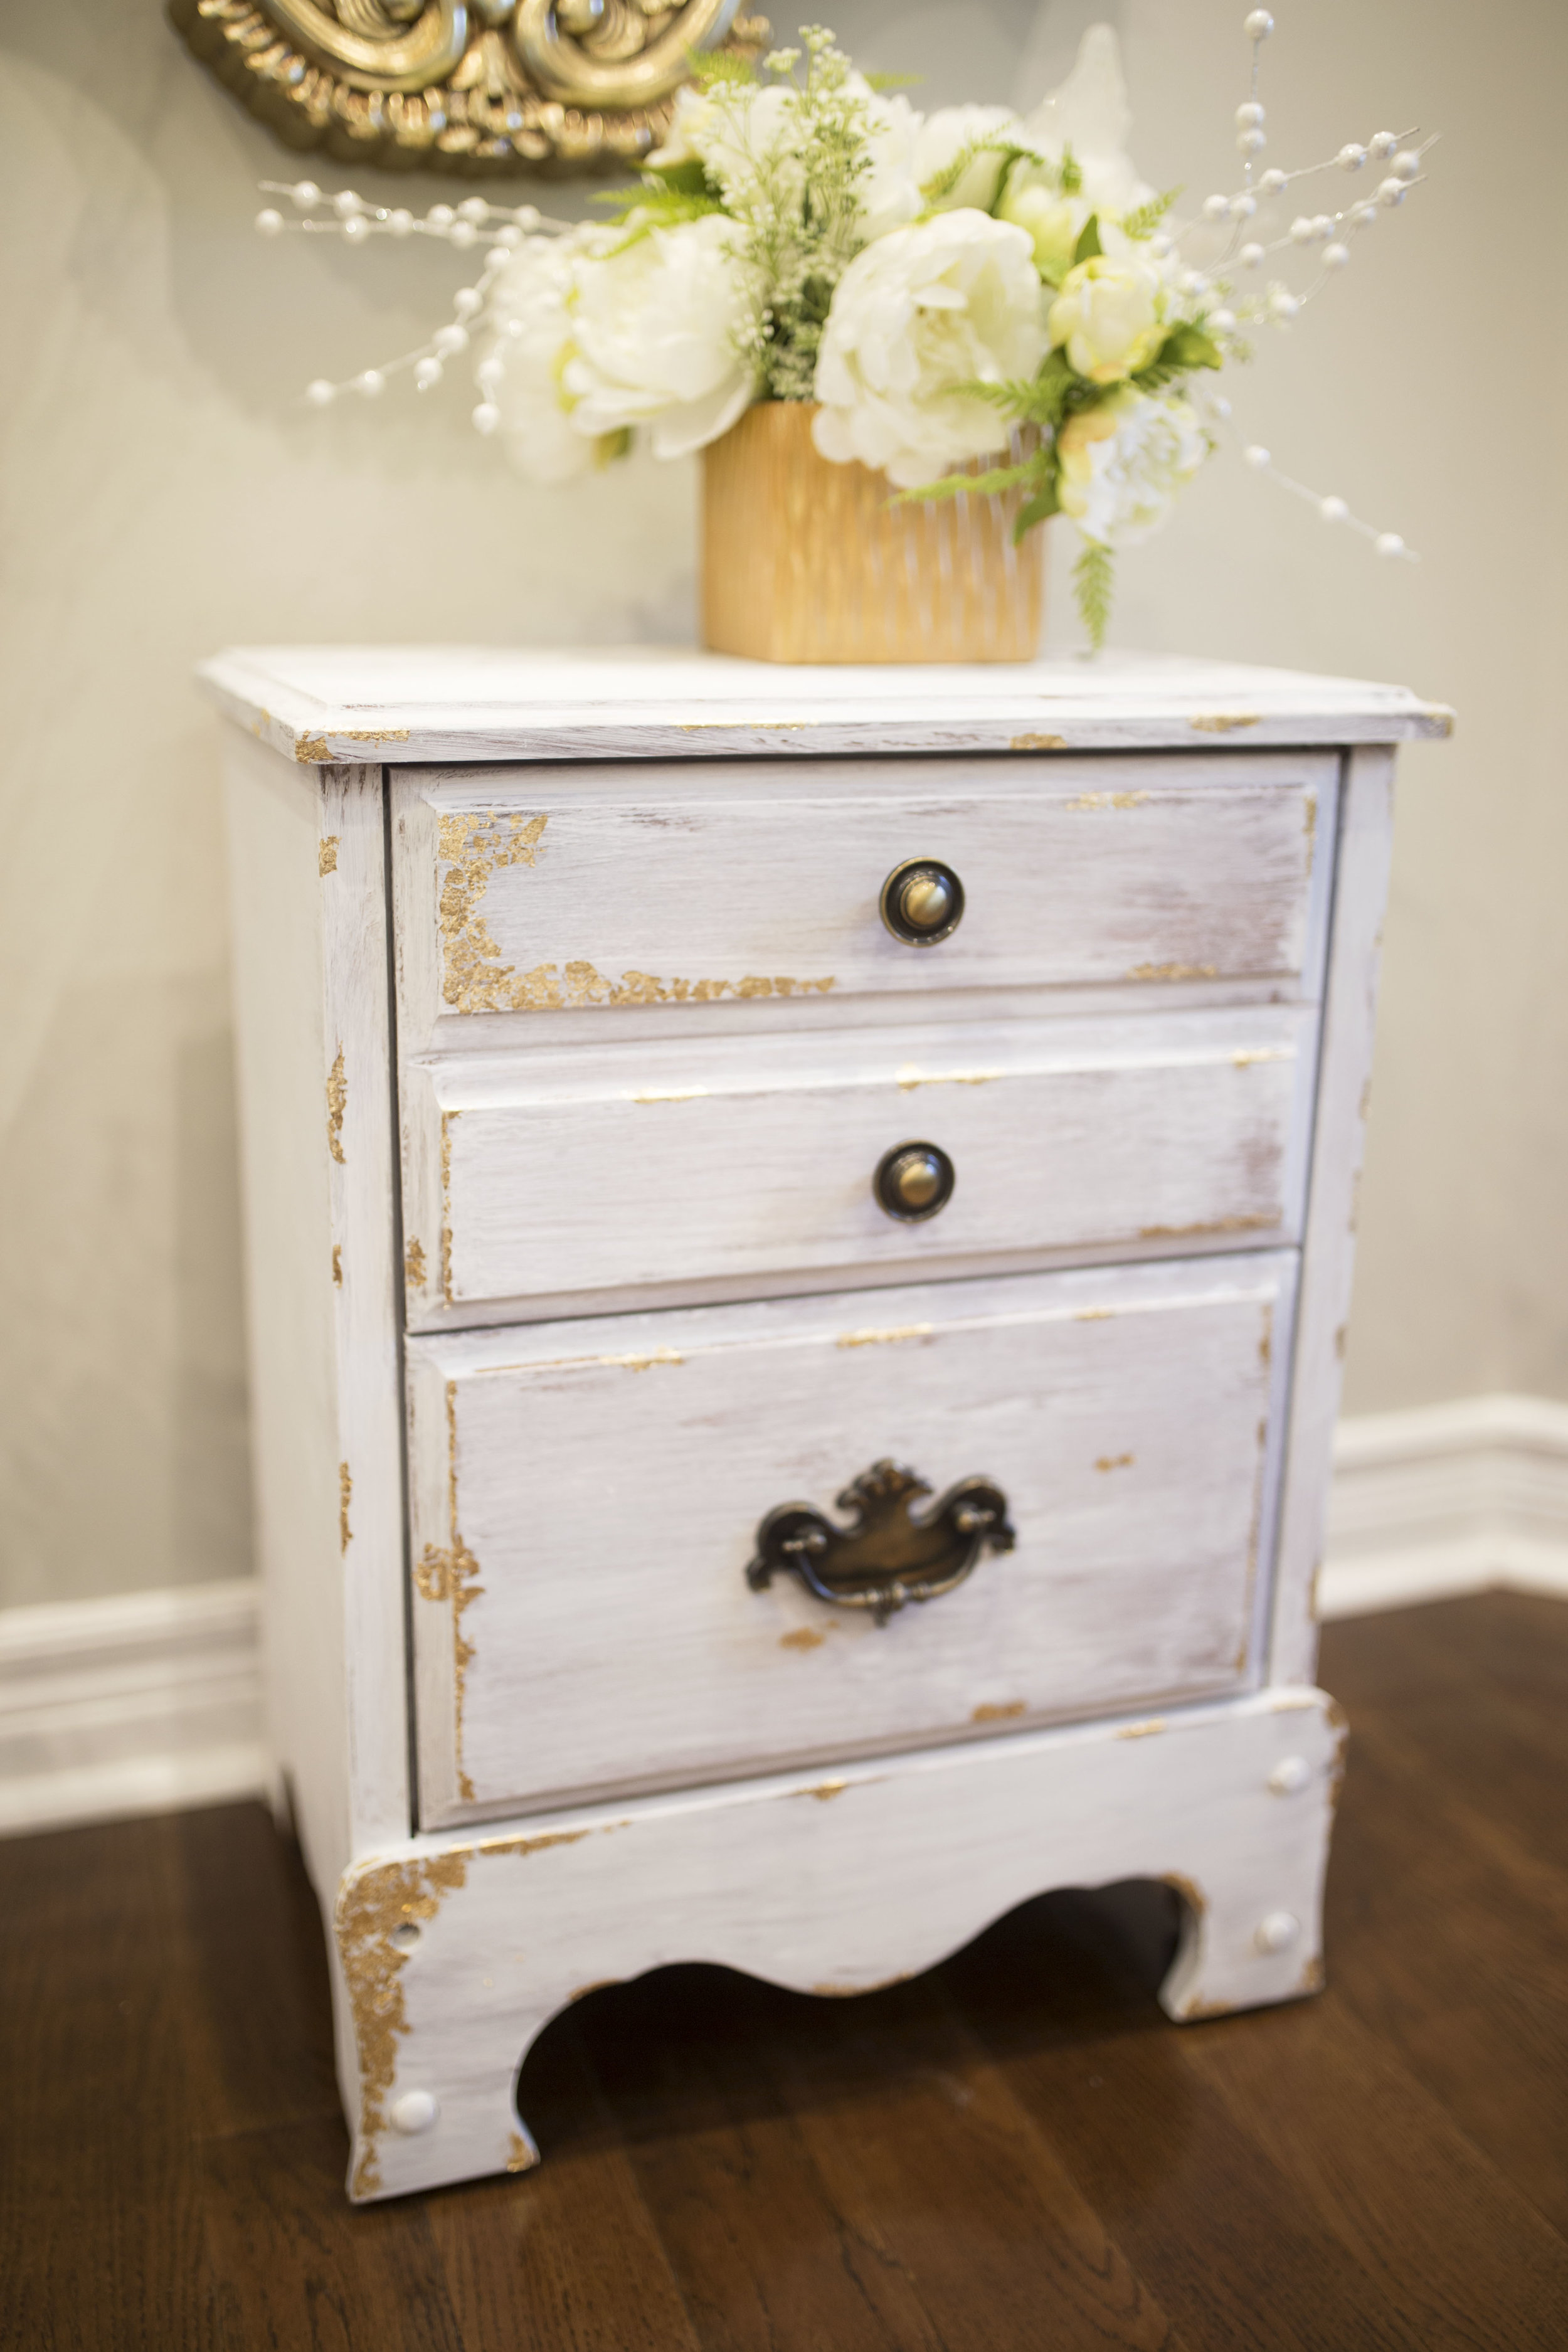
The idea behind this piece was to use the gold flakes that I had found in the craft aisle of dollarama, and carefully glue them in different areas of the tables (such as the four corners, edges and centres of drawers). I wanted this to look like luxury with a hint of shabby chic.
The execution
The execution of this might appear simple and can be done quickly but it is not that way. It takes up a lot of time to glue small, delicate pieces of gold flakes together. This project took me about 6 hours to complete! What doesn't take much time at all is the painting. Took less than an hour to finish, and since it's chalk paint, it dried very quickly.
Here was my process...
Clean first
It was important for me to clean (vacuum, wipe down) the table first, as I had purchased it second hand from Value Village. Inside was debris, some spider webs and even some dead bugs. I wanted to work on a clean, bug free surface before I started to paint.
I first began by vacuuming out the interiors and outer corners of the side table. This cleared out about 80% of the debris and other things to collected inside. It was already looking better but needed a quick wipe down. I used fantastic to remove the red mark left behind from when they marked it for sale at Value Village.

Lastly, because this was in a store being handled by coworkers and passing customers, it was a good idea to wipe it down with some lysol wipes to disinfect the bacteria. It put my mind at ease, as it would anyone concerned with cleanliness, to know that it was cleaner than before I bought it. Now I am ready to paint.
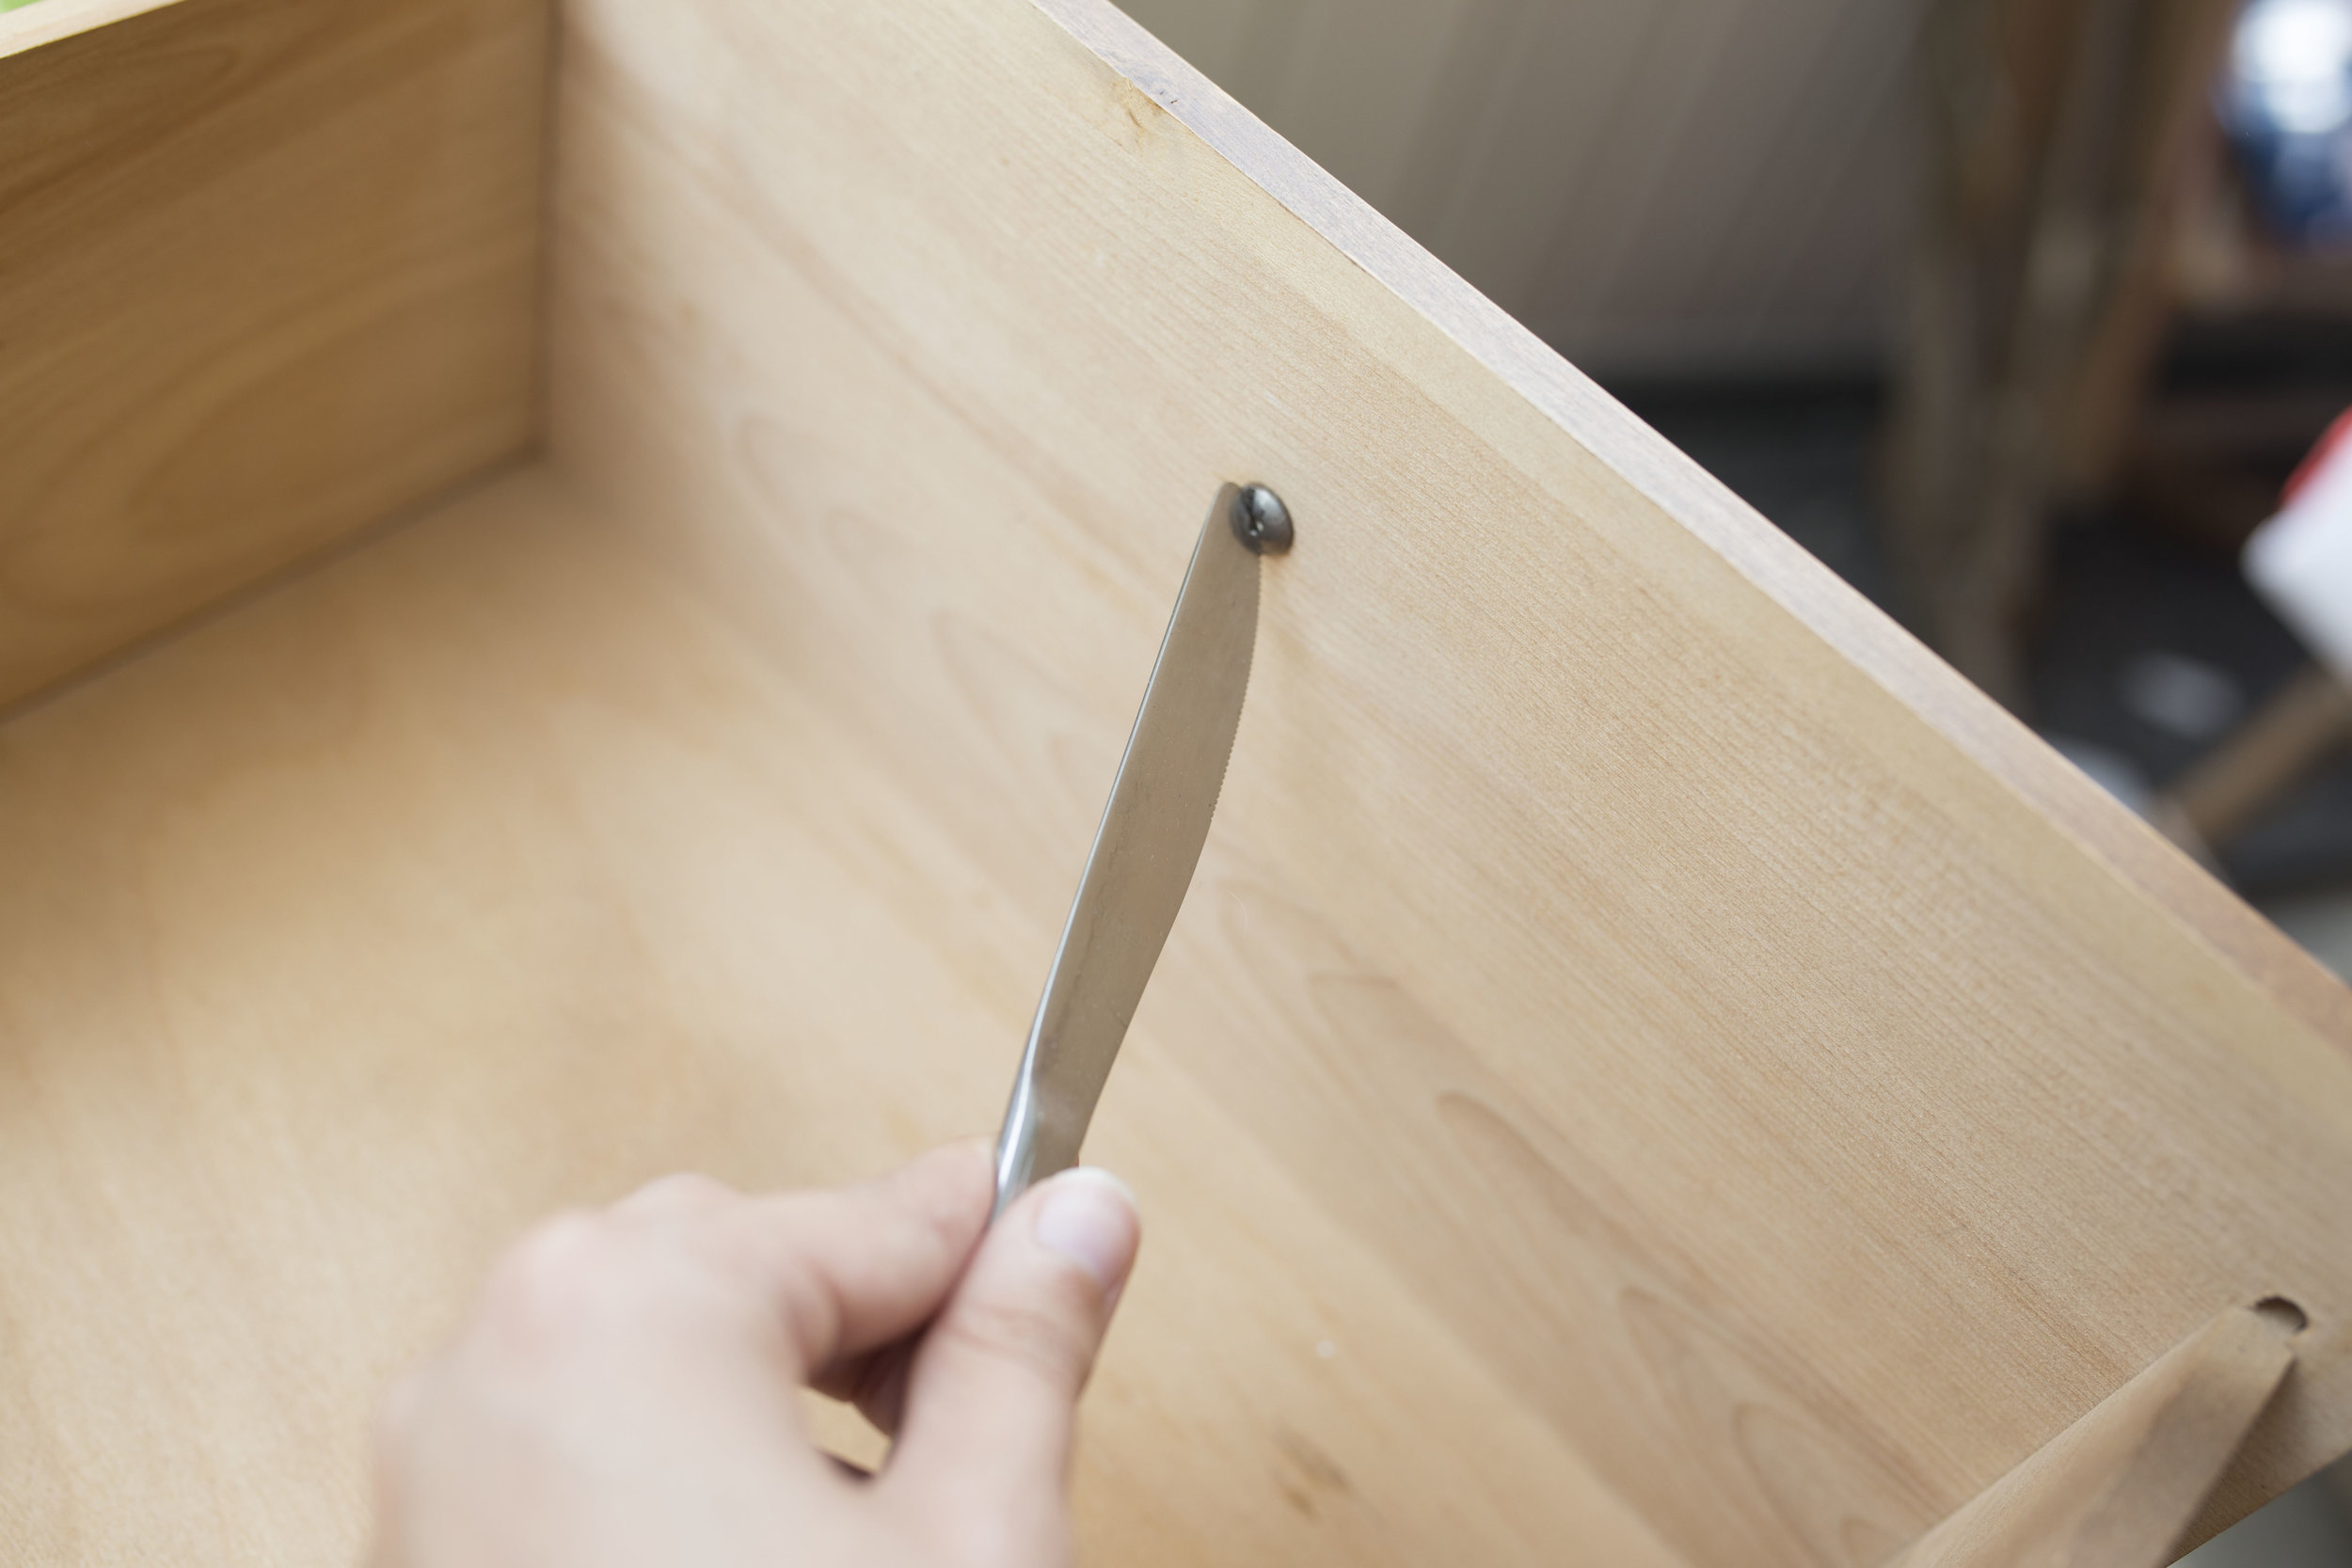
Remove hardware
It’s important to remove all the hardware such as the knobs before you begin painting. You won’t be able to paint freely without removing them first. Keep your hardware inside the drawers while you’re painting to avoid losing them.
Painting time
This part took no time at all. I used rustoleum chalk paint 'linen white'. It's my favourite colour because of love how easy it to apply and makes pieces look more authentically antique compared to other colours available.
You can't really mess up with this kind of paint. It has a chalky finish which means that you'll be able to see your paint strokes, and the paint consistency is more transparent. Painting with chalk paint is as simple as it gets. Here is how I did it.
I used a 2 1/2" paint brush for this entire side table but you can use whatever size you wish. I painted horizontally but you can paint in any direction you want.
This paint dries very quickly so you'll have to be quick with your strokes. REMEMBER** it will look great regardless!
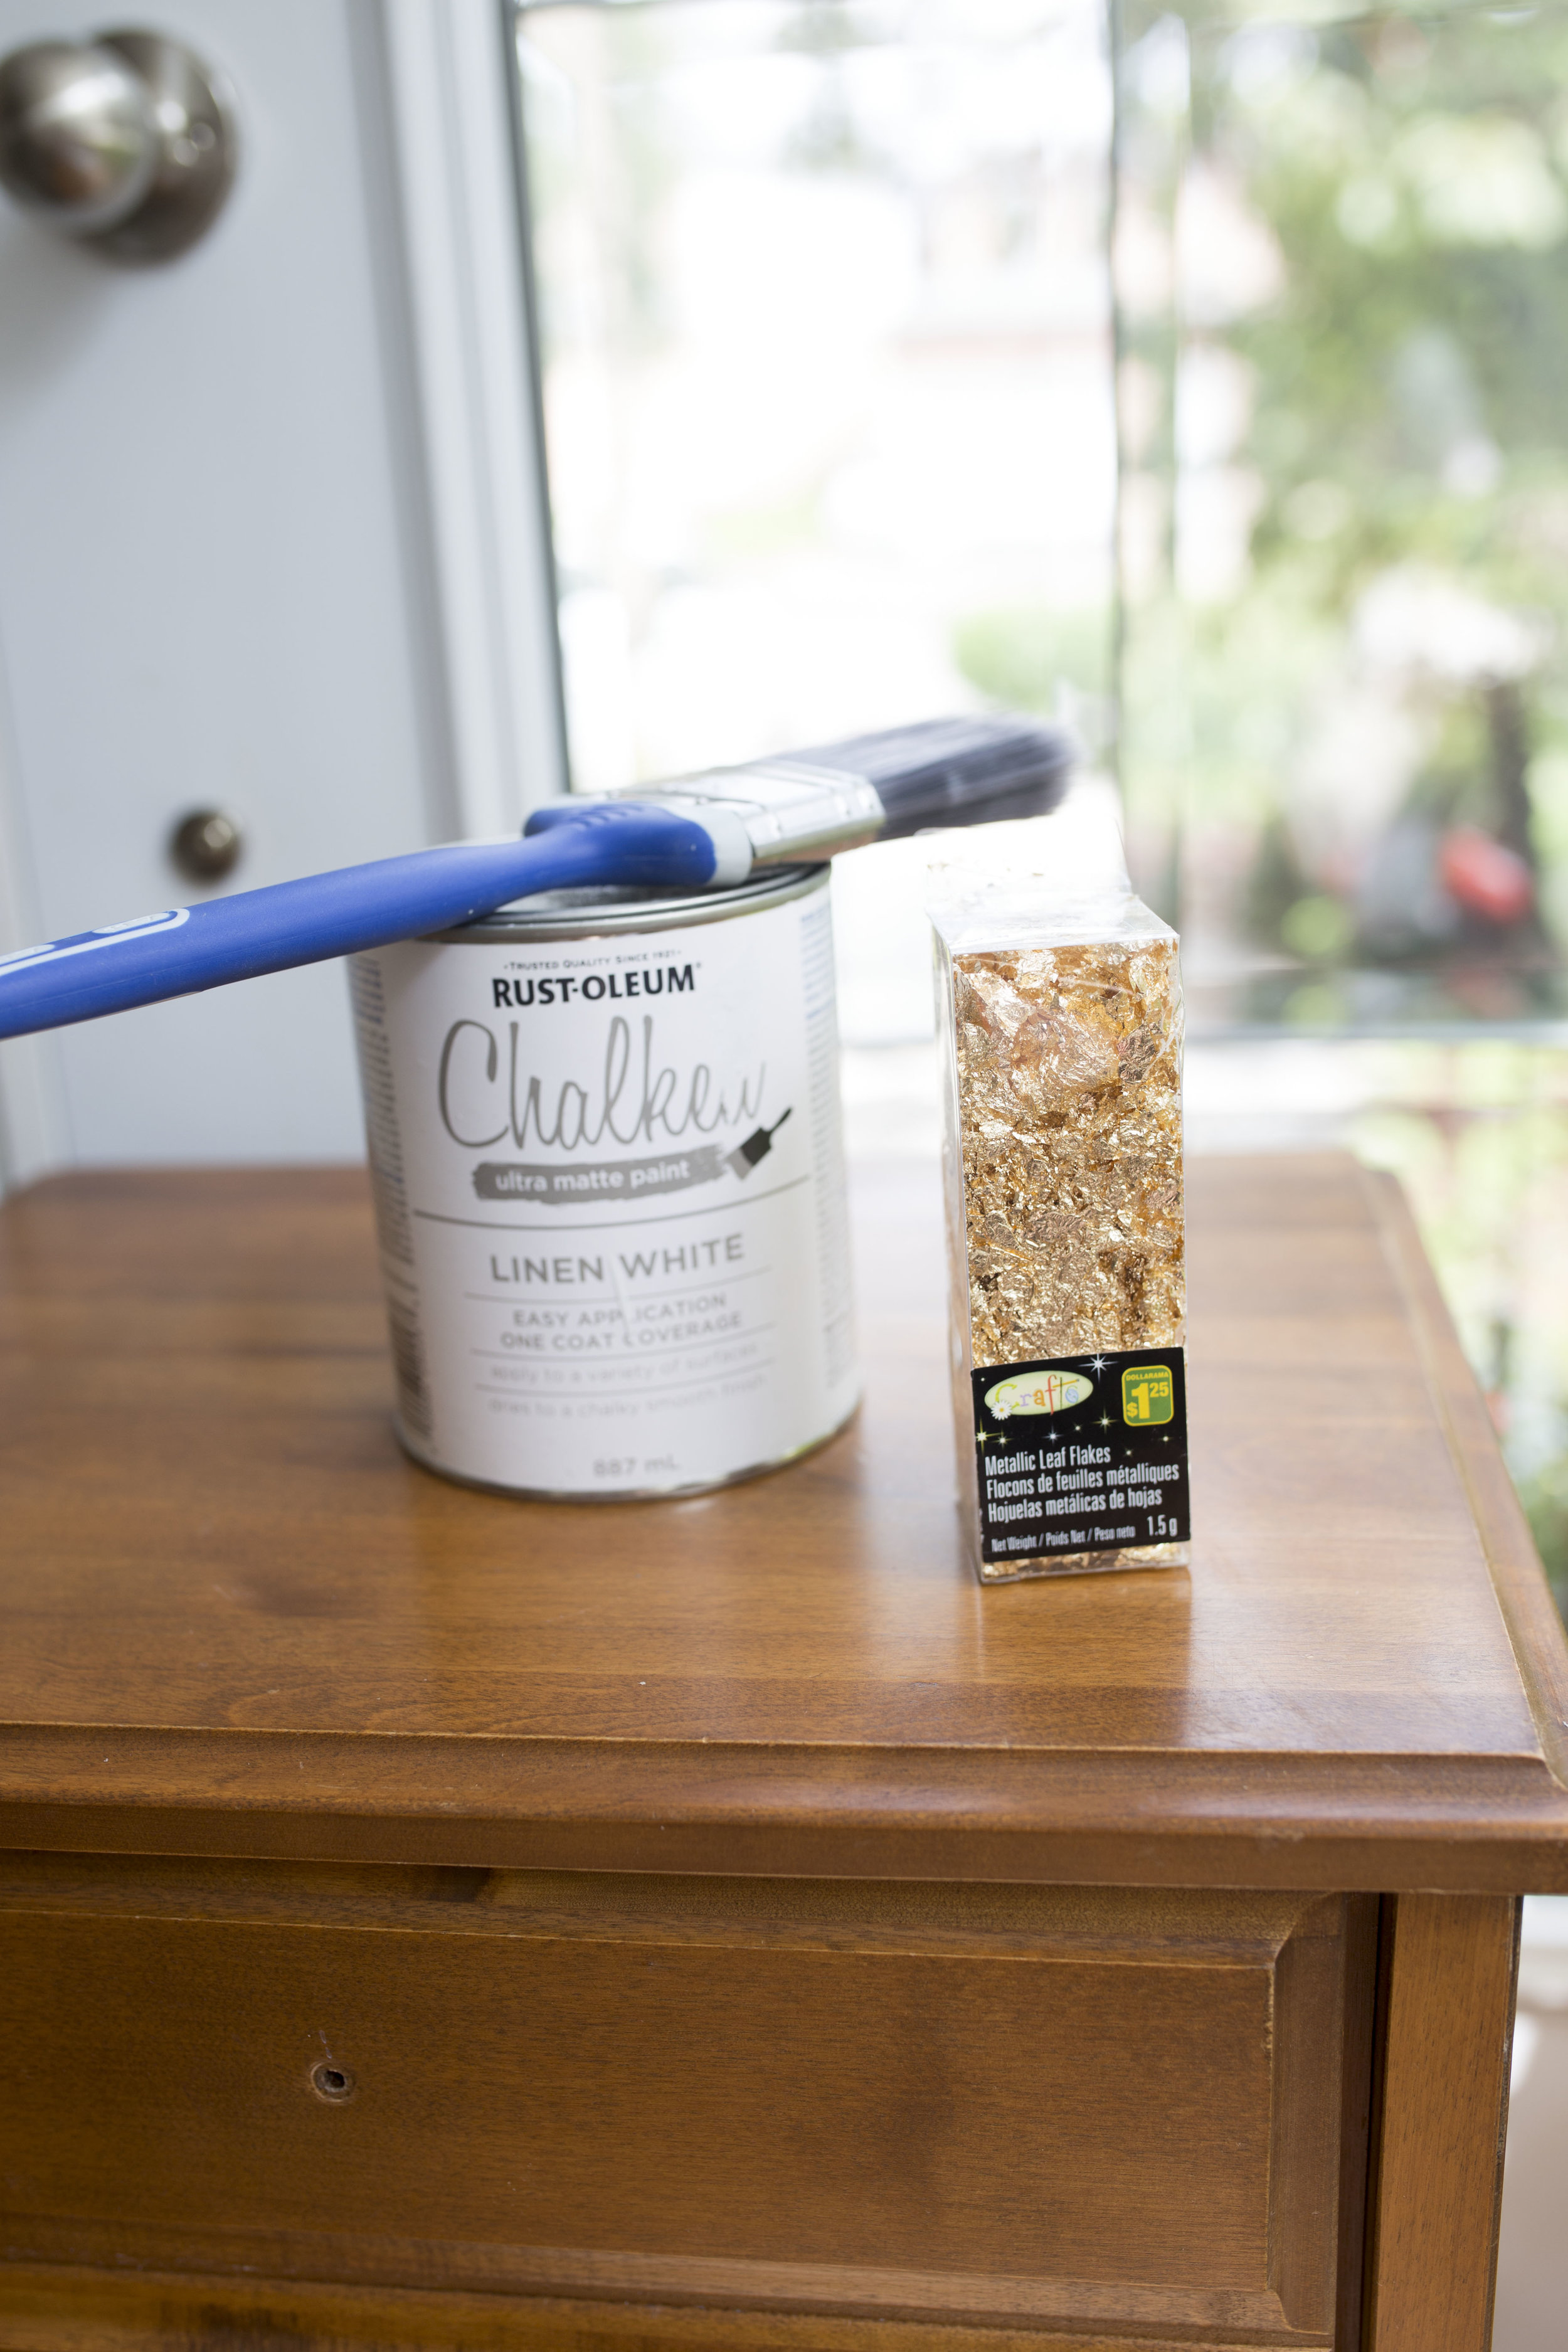

Time for gold
This will be the most time consuming part of your project depending on how much you decide to add to your piece.
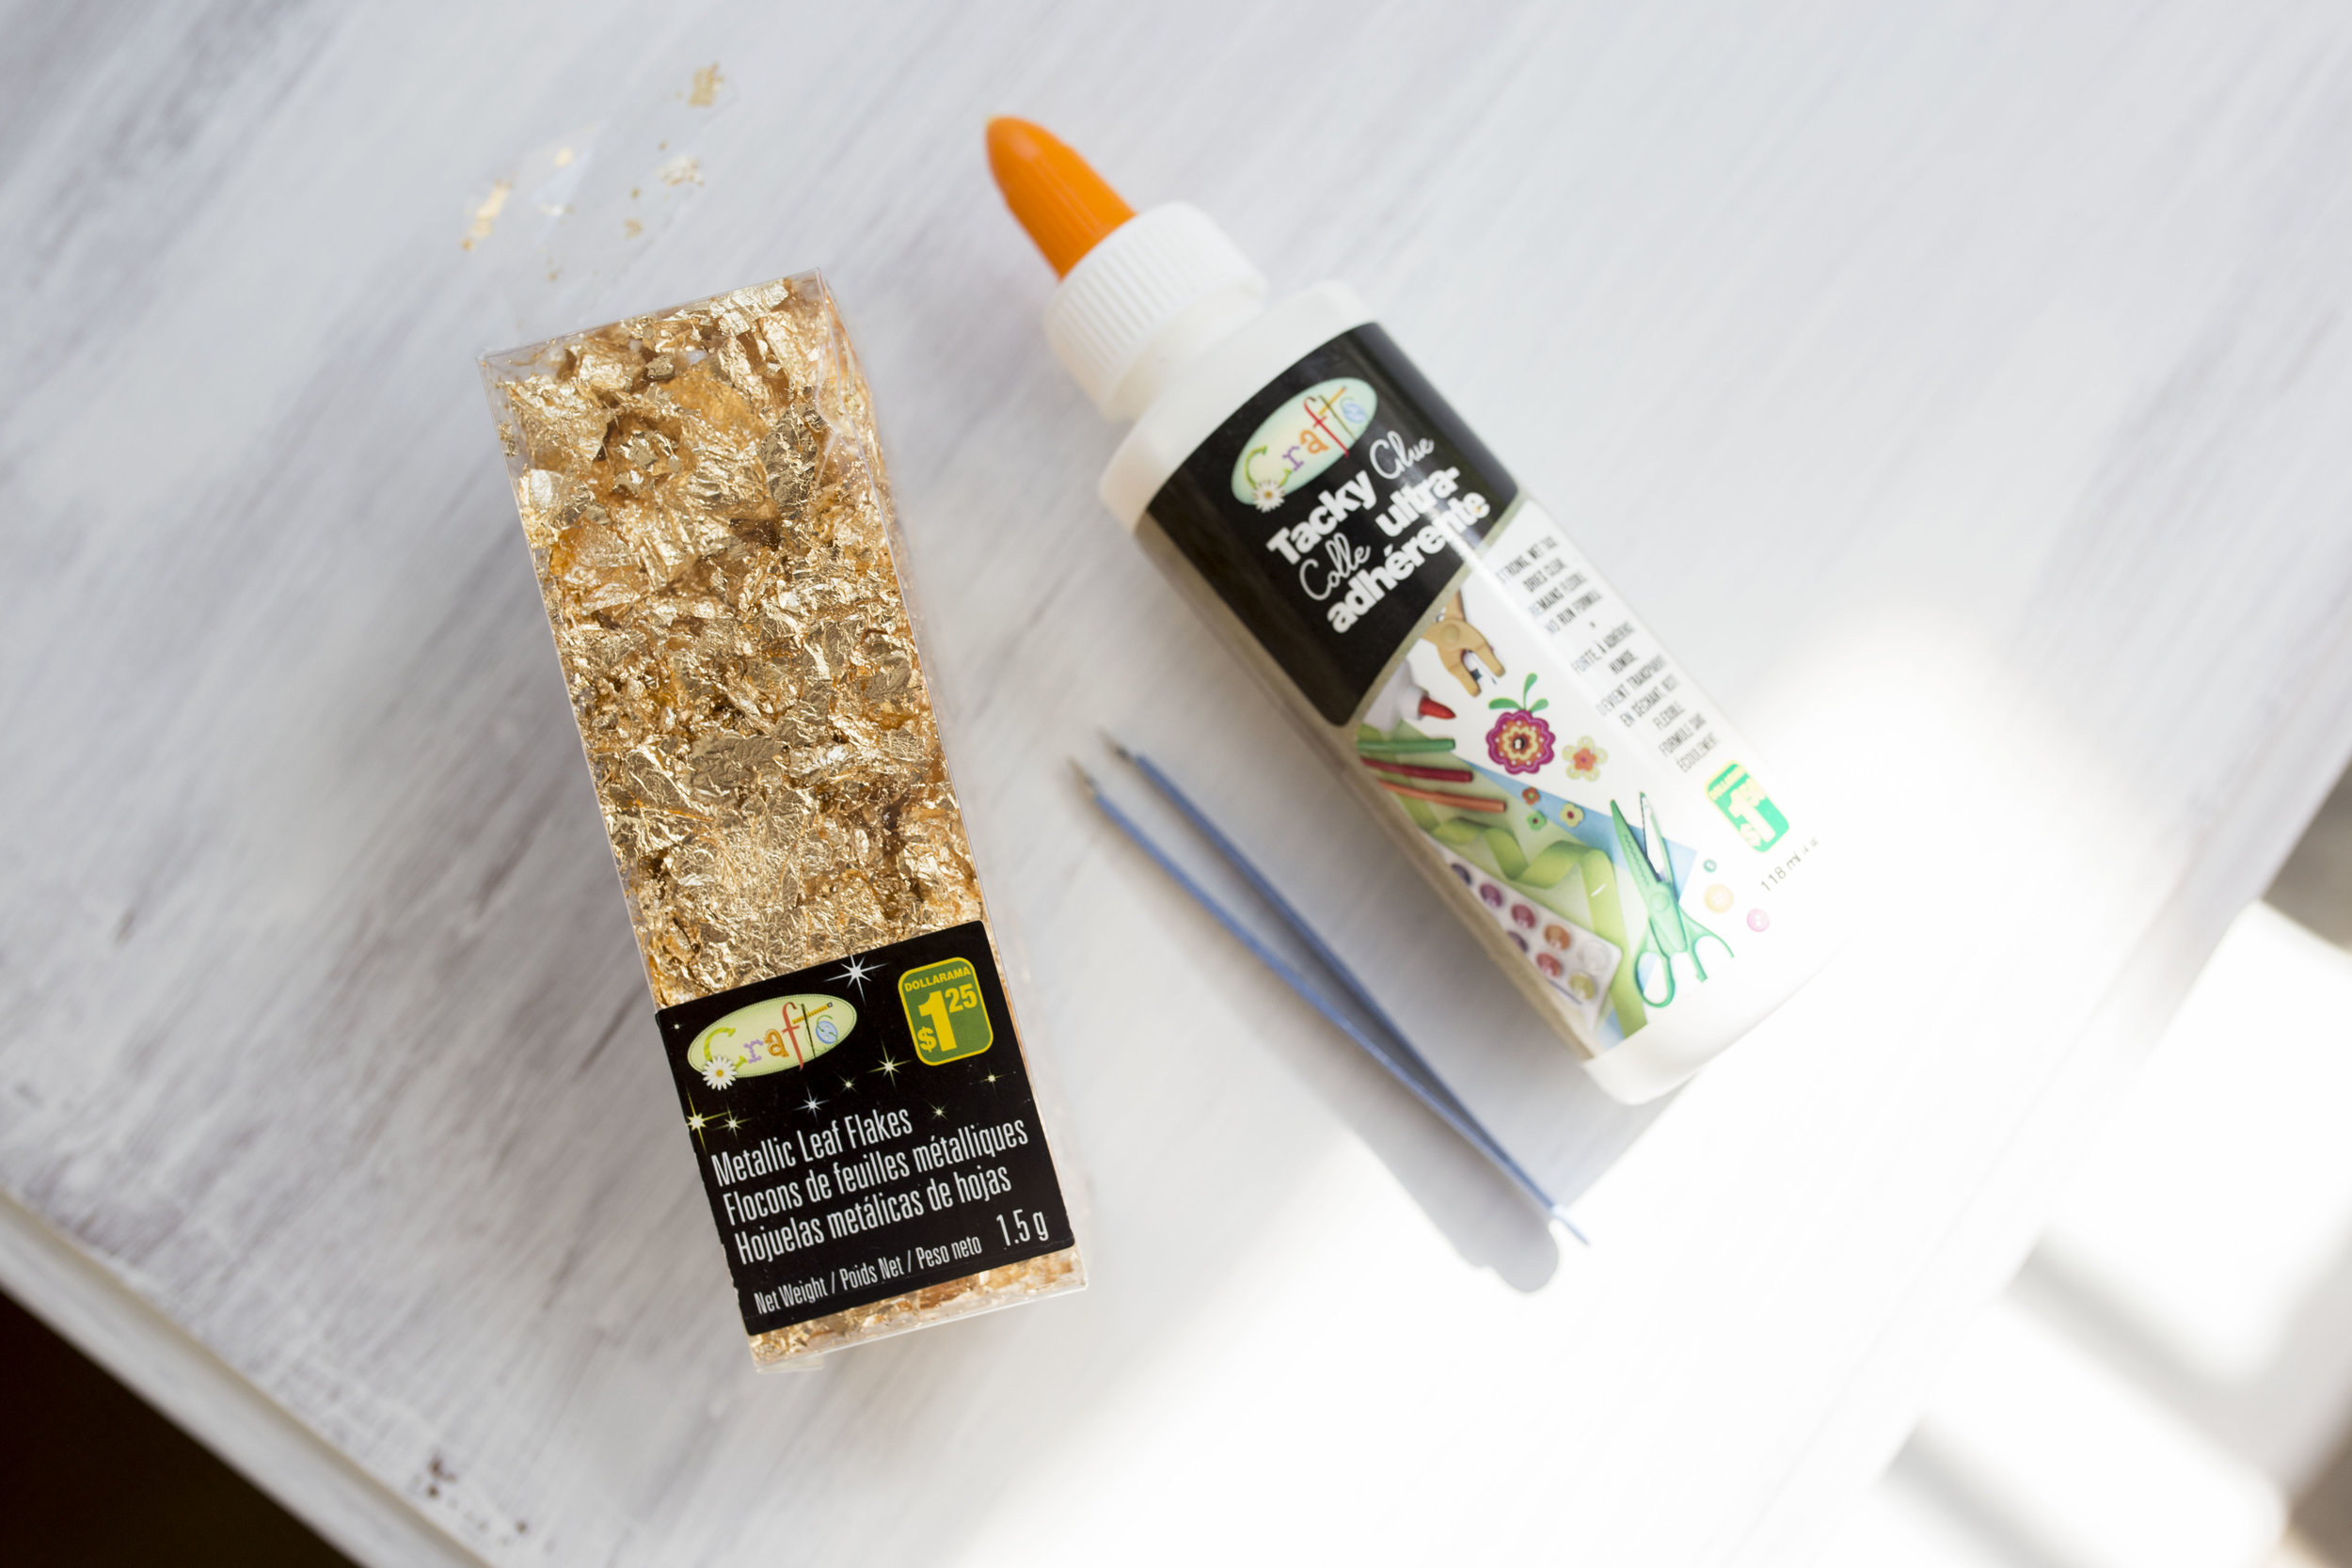
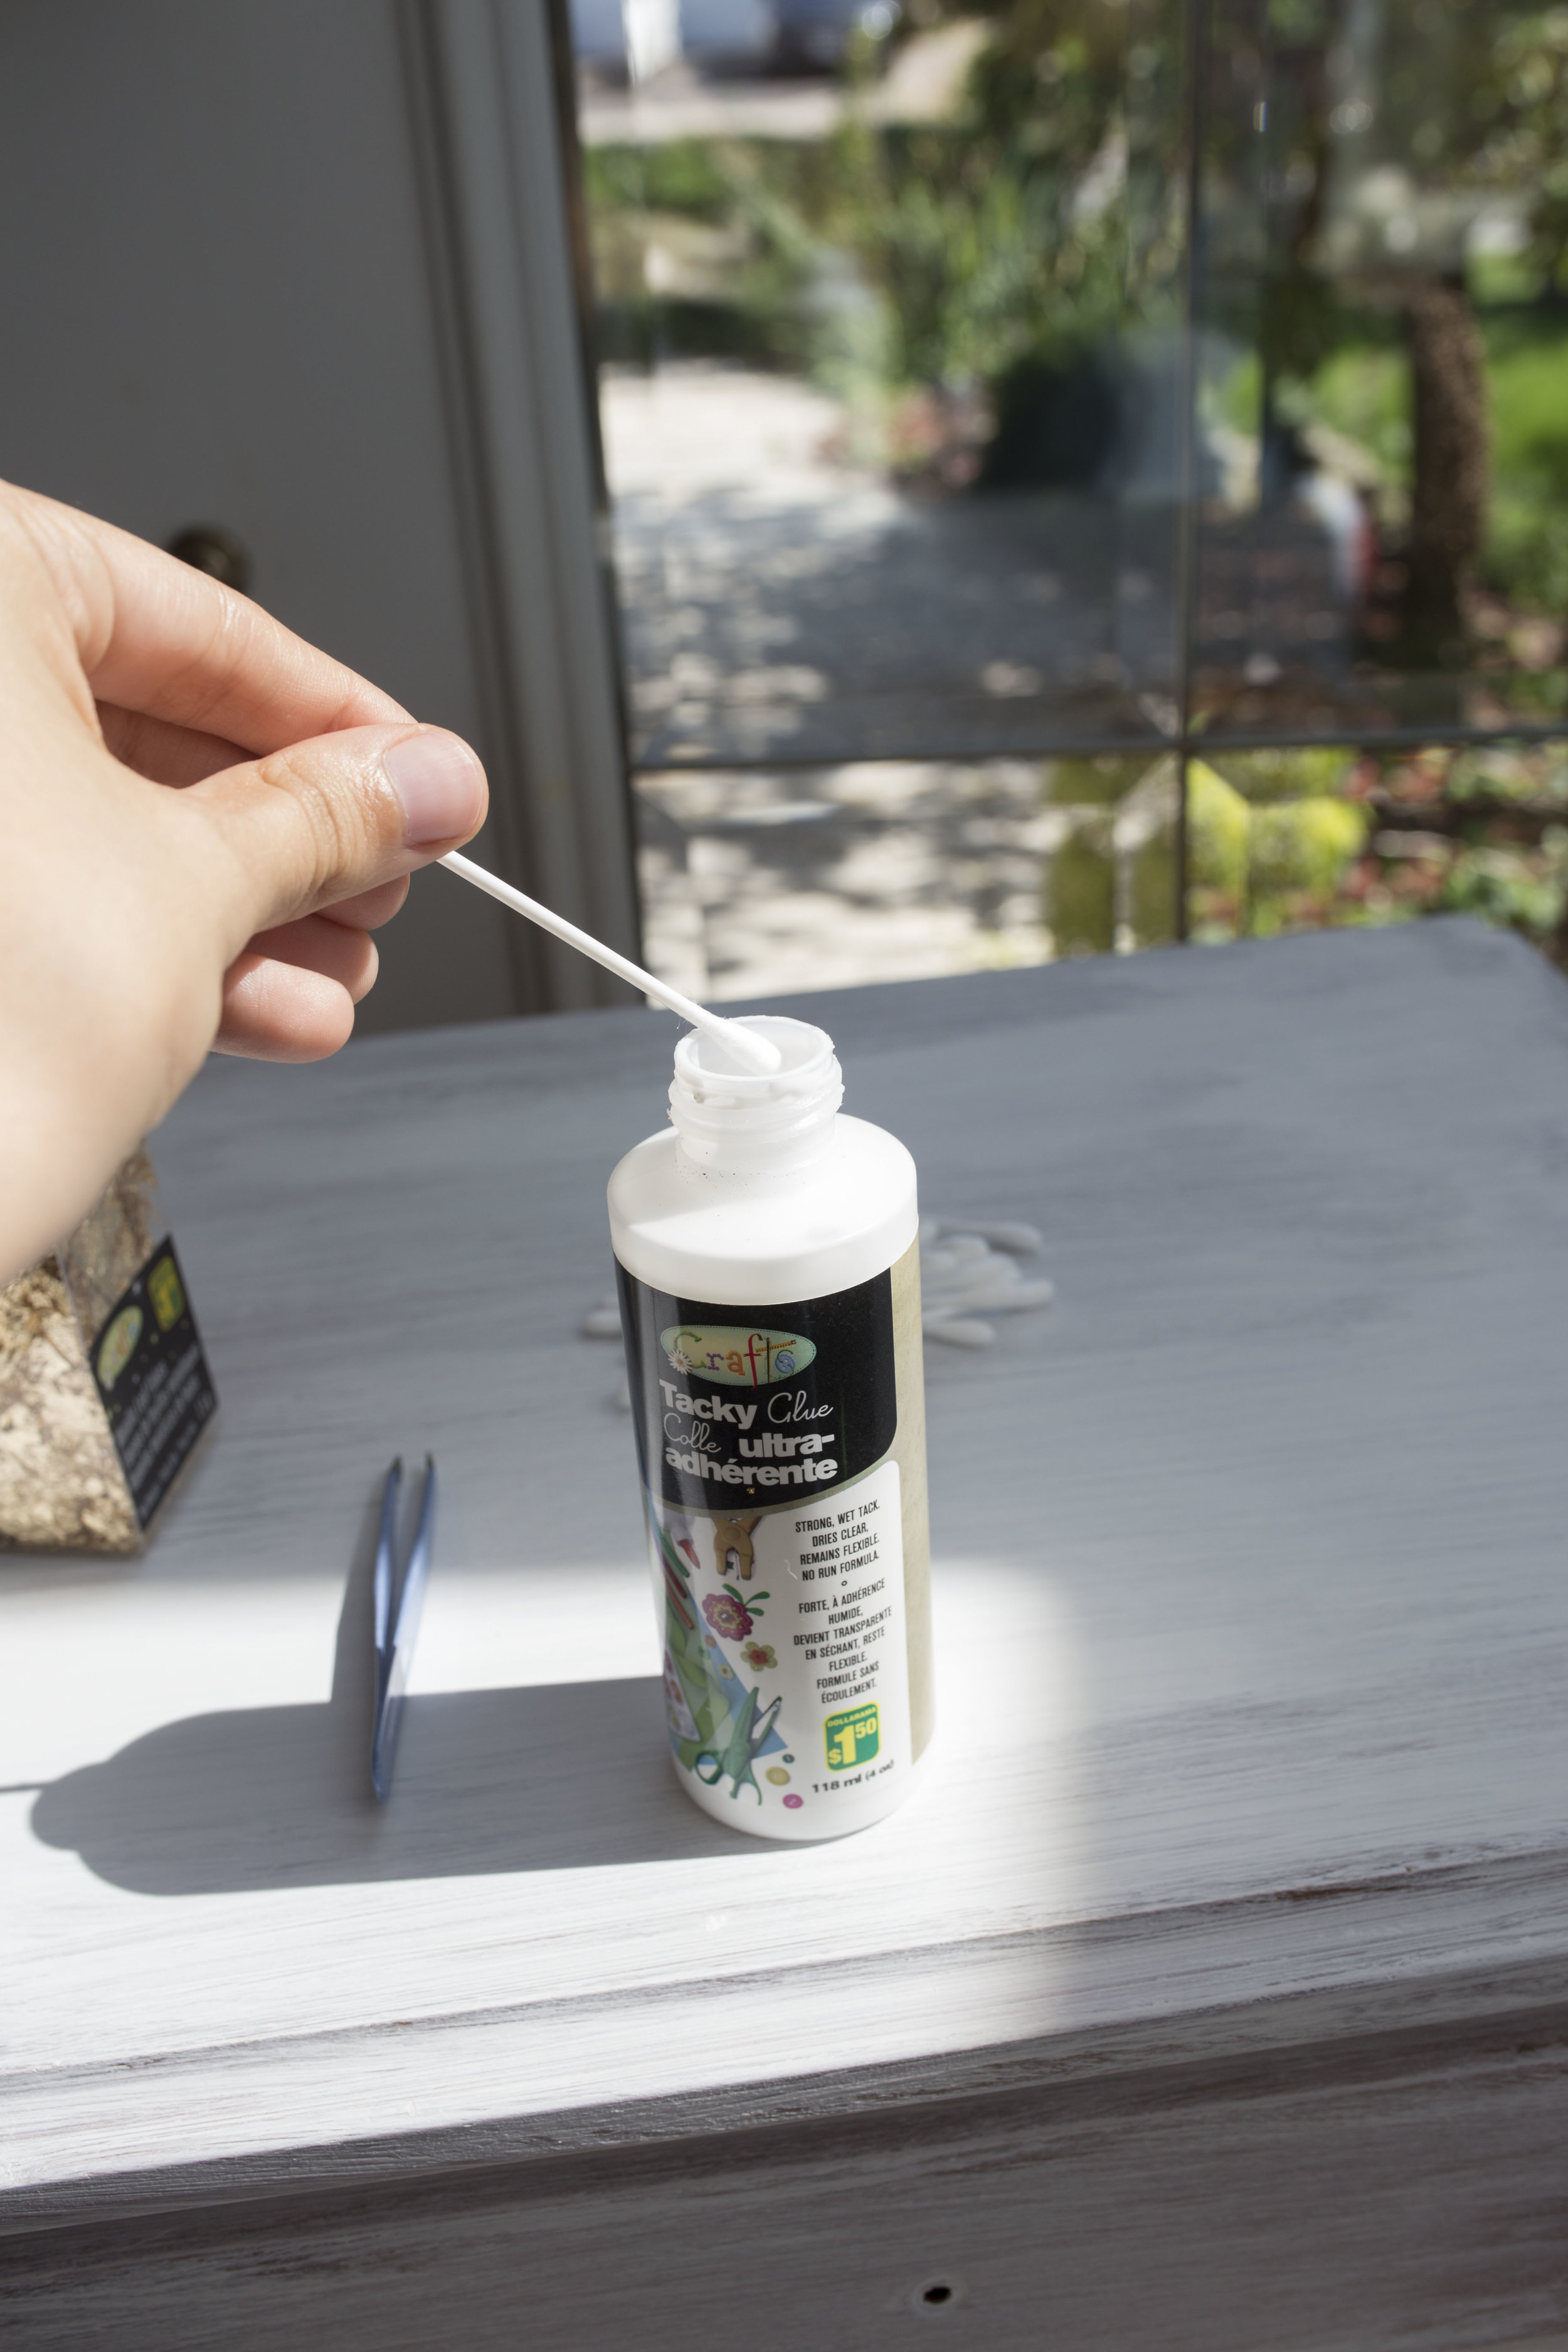
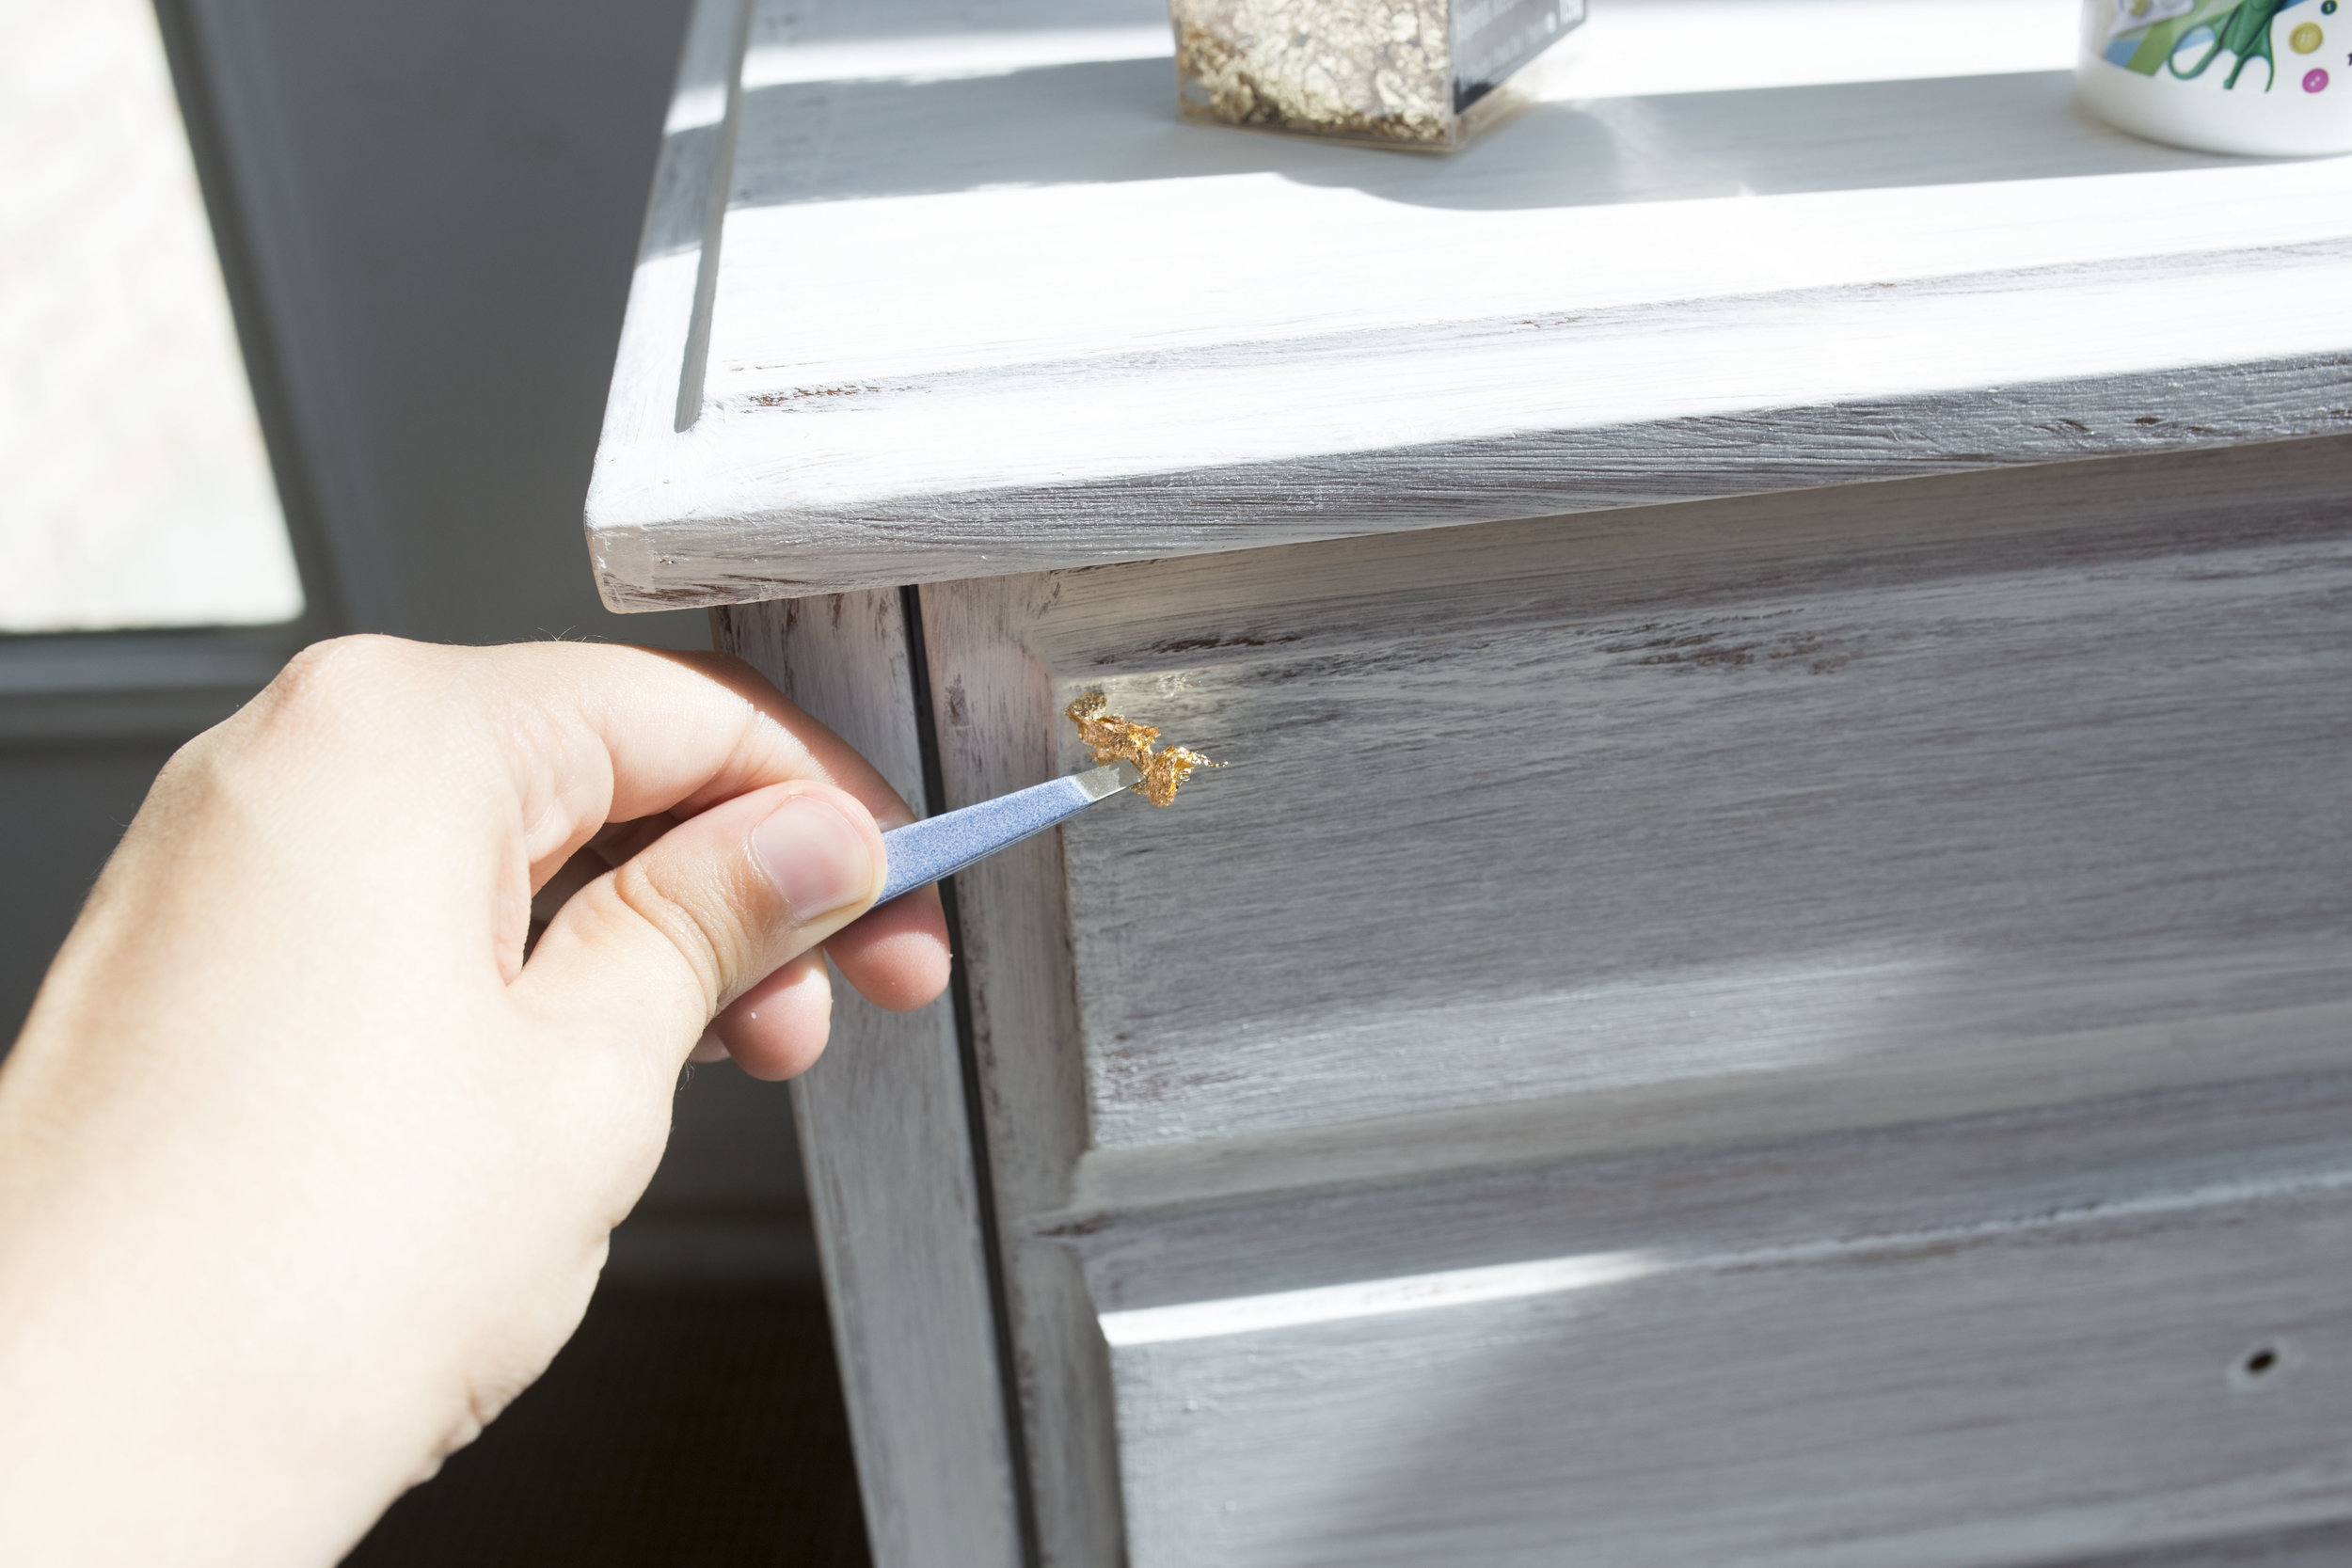
I used tacky glue that I purchased from dollarama to use as adhesive for the gold flakes. It's very crucial that you use only just enough glue because if you apply to much then you risk damagaing the already fragile gold flake paper.
To apply the gold flakes you will need:
[Tacky glue] - This is used as the adhesive for the application of gold flakes. It works very well and dries under two minutes.
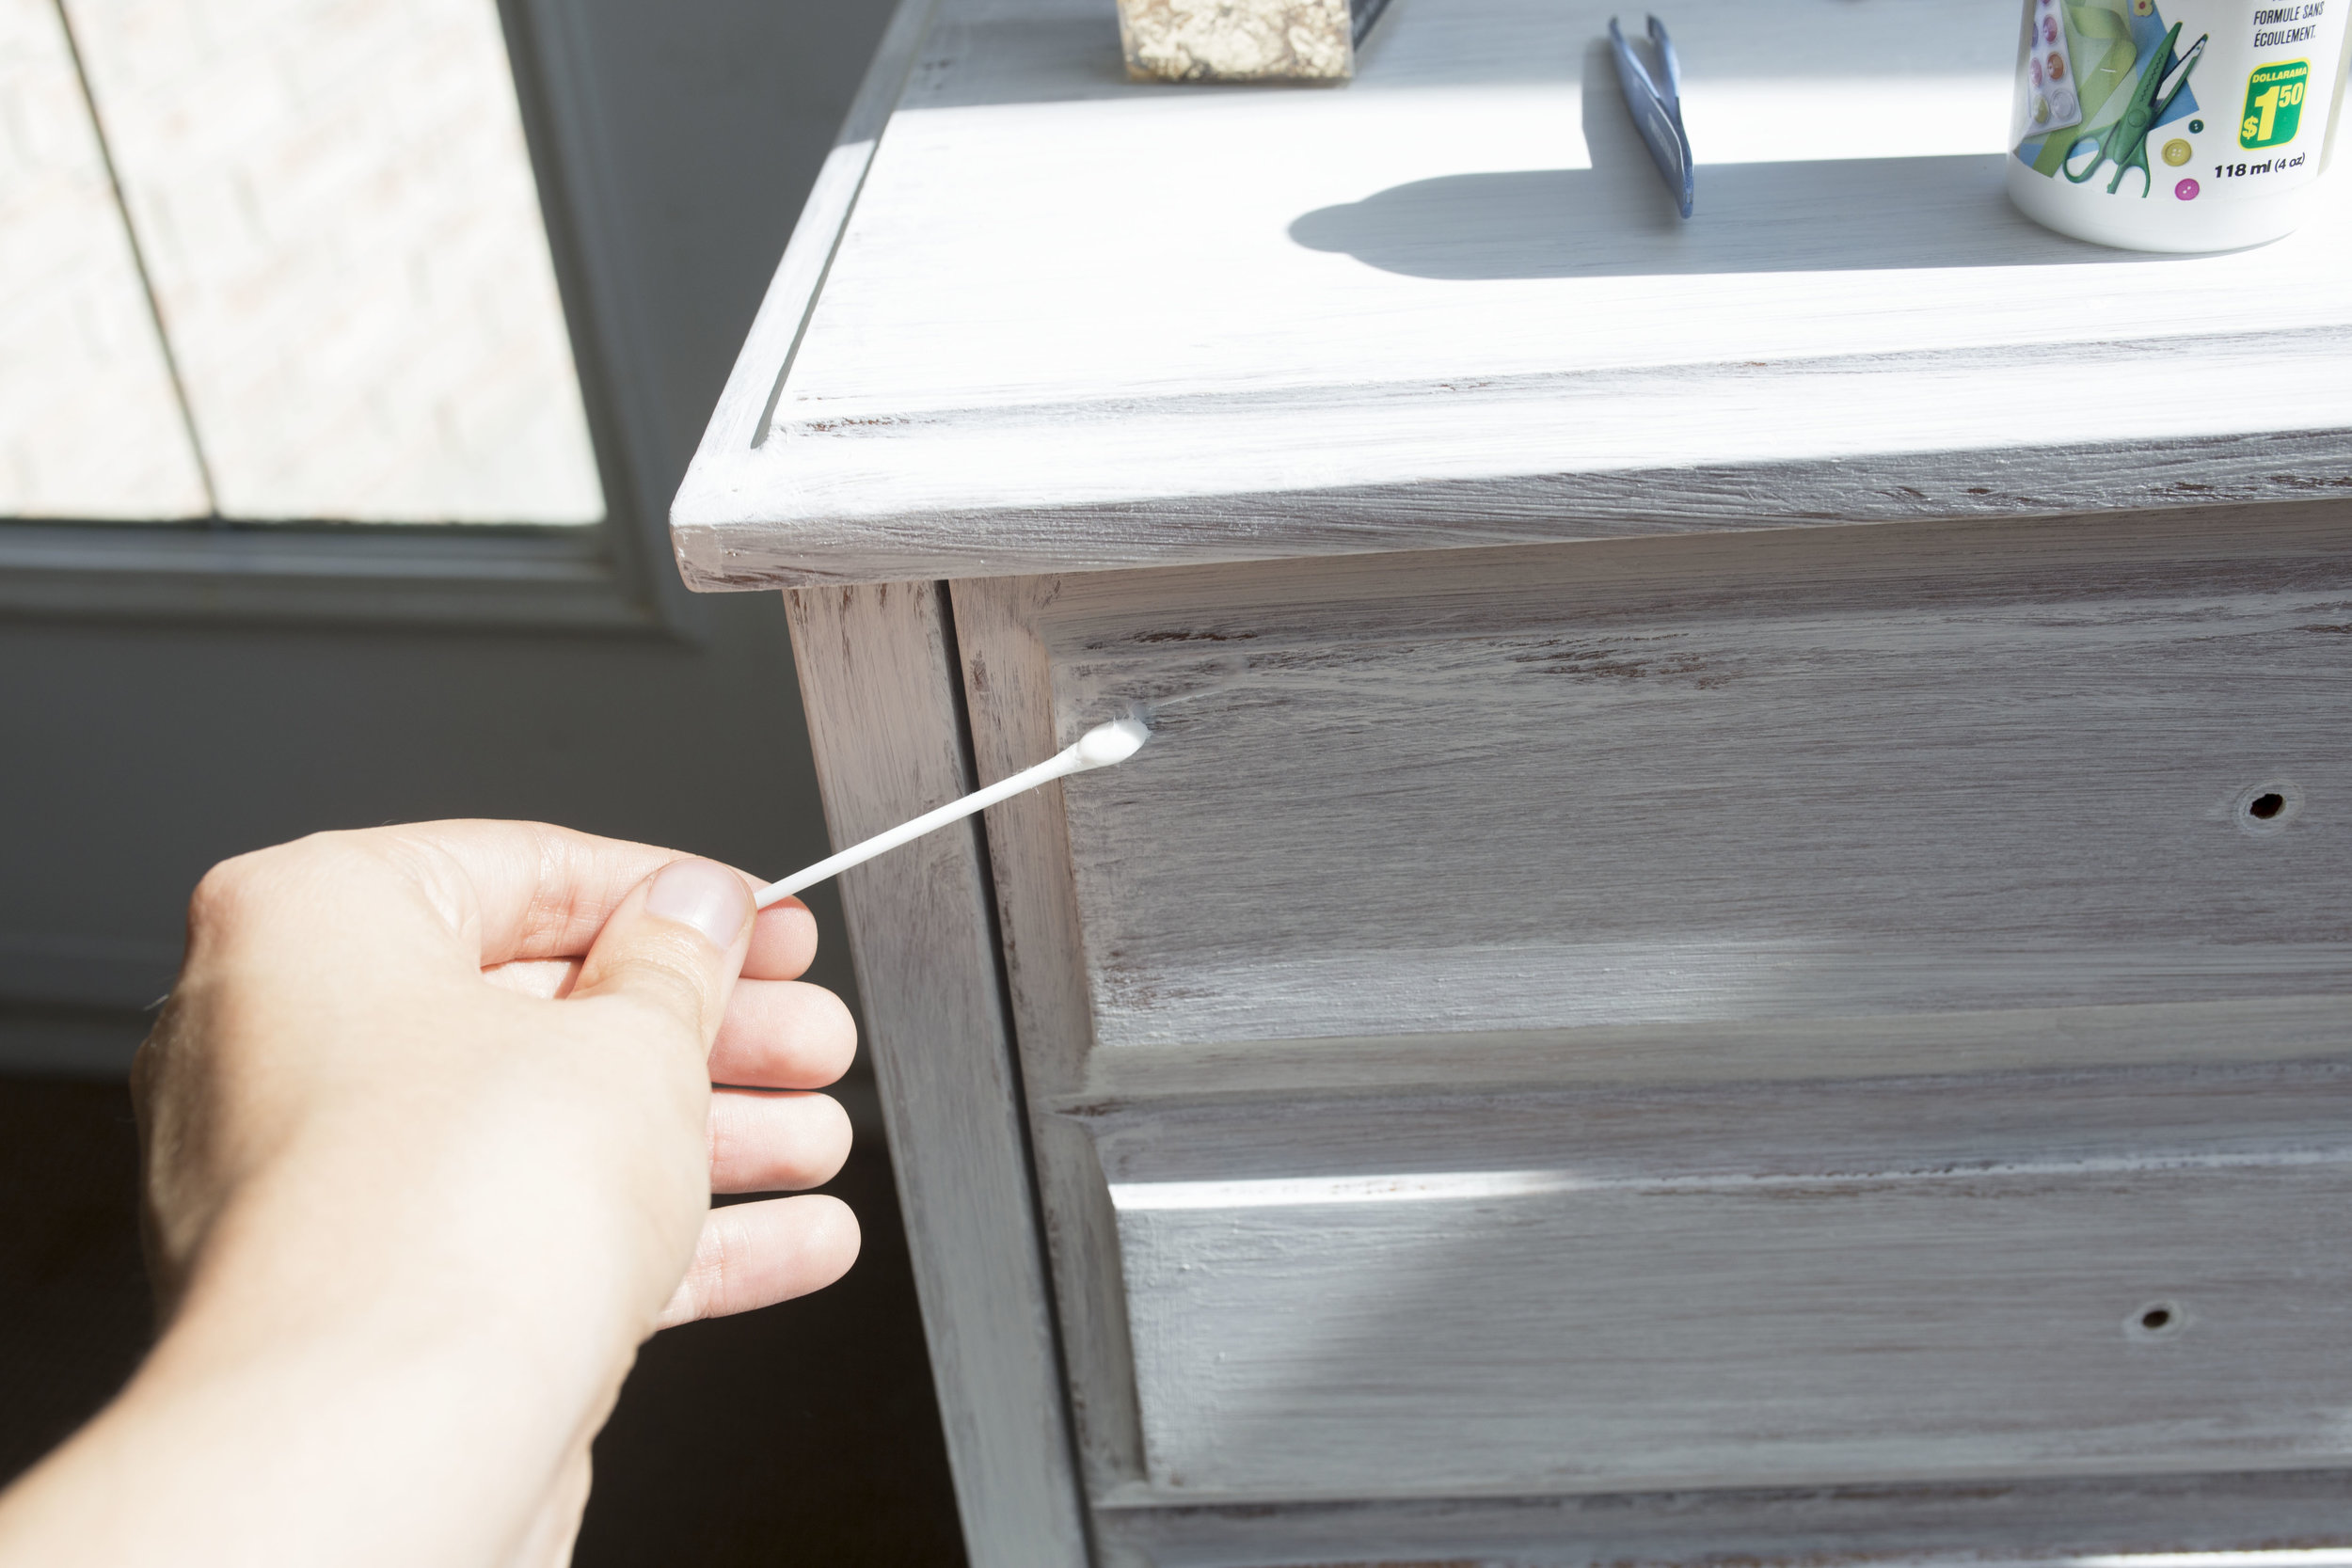
[Tweezers] - This is essential to use when you need to pick up and apply the flakes onto your surface. It has a tight grip and you can use it to rip flakes into smaller pieces.
[Q-TIP] - This is also an essential tool that will come in handy when you need to apply some pressure to smooth out the flake. The Q-TIP is also used as a sanding tool to remove any extra protruding flake and flatten everything out, as well as push out any air bubbles.
Let it dry
Now that you’ve finished placing your gold, you’re going to need to avoid touching it for a little bit. This will help it settle and harden into place. I recommend leaving it over night.
Lightly sand it down
It’s possible that some flakes may need to be lightly sanded down to achieve a smooth surface. If this happens to your table, simply use a 180-220 grit sandpaper to smooth out any rough areas or any flakes extended beyond the surface.
Well that’s it folks!
It’s an easy but very time consuming project to complete but with the BIGGEST impact. It’s amazing to see how you can use dollar store products to completely transform the look of a small side table.
I hope that you are inspired by this and create your very own piece. I would love to see what you create! Please share with us in the comments below or tag us on Instagram!
Thanks for stopping by :)
-The Dollar Store Girl
FACEBOOK - @dollarstoregirl
INSTAGRAM- @thedollarstoregirl